

The various X-Wing forums have made many a mention of the list commonly know as 'Han Shoots First'. And it's clear that it's resilience and it's ability to churn out attack dice have made it both a tough cookie to beat and a successful contender on the tournament scene.
But I've always felt the 42pts spent on the two Rookie X-Wing Pilots would be better spent by taking another YT-1300. Certainly an all your eggs in one basket approach. But a basket strong enough to carry both of Jabba's balls and still have room for a couple of Jawas...
Of course, the twin Falcon / YT-1300 list isn't necessarily a new idea. But whilst the lists I've seen take understandable advantage of the 'Han + Gunner' combo, they've failed to really unlock the opportunity of powerful synergies between both ships...
 |
| 16 hull, 10 shields and 6 x 360o attack dice, base. A match made in heaven? |
Let's take a look at the proposed list, starting with Han:

Coming in at a combined 53pts, Han's core ability to re-roll his attack dice if the first roll stinks is augmented by the Gunner's ability to subsequently re-roll if none of these attacks hit home. Which in turn can be re-rolled by Han... Clearly, the odds are stacked in Han's favour and along with the fact that he'll usually be shooting first with his pilot skill of 9 with a 360o firing arc, will mean most targets are in for a rough ride.
And whilst the first part of this combo isn't unique, as we'll see next with Chewbacca, this list is primarily all about flying the two ships in close formation at all times, specifically within range band 1. This ensures the Swarm Tactics ability confers Han's pilot skill of 9 to Chewbacca and helps to maintain that punishing fire superiority...

Coming in at 46pts, Chewbacca's core ability of never feeling the effects of a critical hit is partnered with Draw Their Fire. Ensuring that as long as the ladz stay within that crucial range band 1, Chewbacca can soak up the crits Han may receive... Assuming the enemy has already successfully chewed through the Falcon's five shields...
The Weapons Engineer upgrade enables Chewbacca to maintain two target locks for every one target lock spent. Granted, at 3pts, Marksmanship would probably provide a more potent attacking capability but would also mean sacrificing Draw Their Fire in that all important elite pilot skills slot. What Weapons Engineer does do is enable Chewbacca to keep up the target lock re-roll pressure by 'dominoing' this effect across multiple targets and thus into subsequent game phases. And with large swarm / large number of attack dice enemy formations potentially being the counter to this list, this ability will certainly help to ensure enemy ships begin to be as wary of Chewbacca's sustained attacking capability as they will be of Han's deadly accurate fire...

Let's do a quick summary of the lists key strengths:
- Pilot skill 9 all round
- High combined fire output with numerous re-roll opportunities
- 360o arc of fire
- High shield / hull rating with ability to negate critical hits
That's a lot to like.
As mentioned earlier, for the list to fully benefit from it's assigned upgrades, there is still the consideration for both ships to stay within RB1. Clearly, this presents very little problem when travelling in straight lines but when it comes to banking or turning, it's critical that the ships don't overlap and cause one of the team to lose his action. To help with this, you could always try delaying having to turn in the first place! As the game starts, you needn't be in rush to close space between you and your opponent. Let them come to you and when the point comes that you cross each other's paths, you can always just keep moving steadily straight ahead, safe in the knowledge your 360o fire arc will do the rest. When of course you do eventually need to make that turn, don't forget that the ship on the outside will have to make a wider and longer sweeping turn than the ship on the inside...
 |
| This may look obvious now... |
Finally, it's worth remembering that the risk of losing your action occurs when the ships' bases overlap and not the actual models themselves. In this case, base one of your ships on one peg and the other on a two peg flight stand, so if things get a little tight, the models can overlap without any awkward model bumping.
There is of course still the little matter of asteroids to consider... o_O
Well, I'd be interested in hearing what you think of the list, what you might tweak and what may improve it. Don't get me wrong, I know the 'Twin Falcon' list isn't everyone's cup of tea and is a particularly beardy list as far as X-Wing lists go. And I for one hold the belief that to put two identical Falcon models on the table would be sacrilege to the name of the great ship! (That's partially why I created the YT-1300 freighter that is the Albion Star)
With all that said, how does the list actually fair in combat? Well, I was granted the opportunity to test the list's metal when I played me ol' buddy Pete at last month's club day. Critically, I wouldn't be in for an easy ride as I would be facing Pete's undefeated, tournament winning Sabre Squadron, led by Baron Soontir Fel...

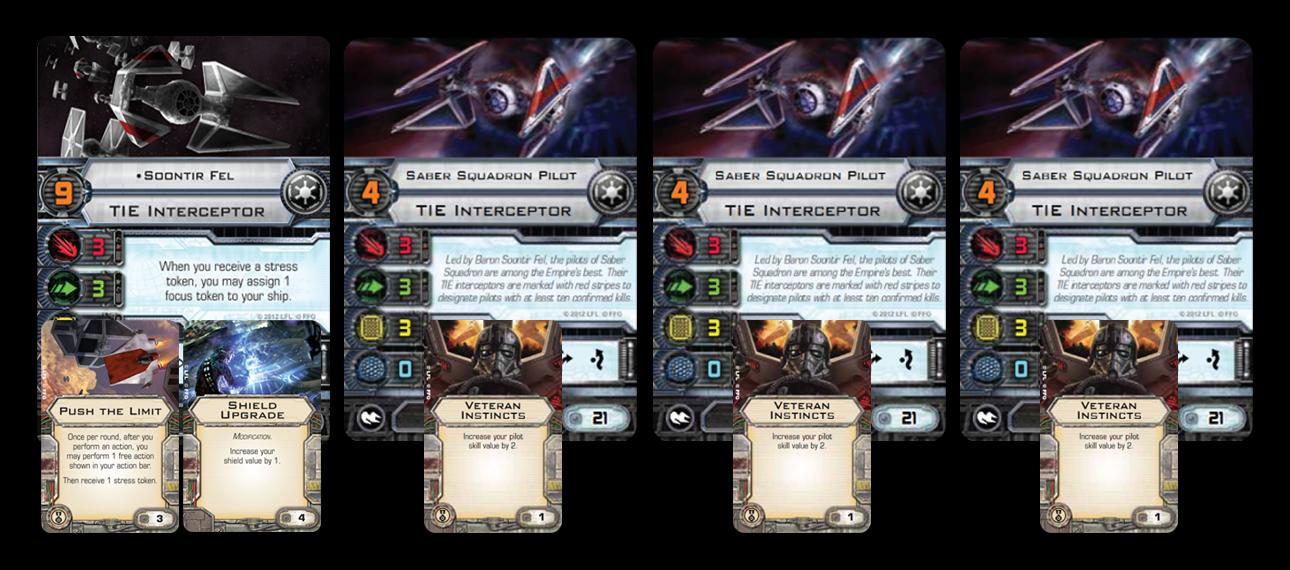
Set up would see me place my YT-1300s in the left hand corner with a view to making a steady advance towards the center of the board, with an eventual horse shoe turn as I passed the board's half way point. The Sabre Squadron set up in the opposite corner... sharpening their, err...sabres!

As the ships closed the distance, Han and Chewie began their left hand turn only for Baron Soontir Fel to break formation and attempt to face them down head on! After a fierce exchange of RB1 fire, Fel exploded in a ball of flames and Han and Chewie punched the air with delight! One down, three to go...
 |
| Carnage ensues as both sides roll dice like they're going out of fashion... |
But whilst Han and Cheewie were happy they'd manged to remove a major threat so early in the game, they were becoming increasingly concerned at the fact that their ships were now close enough to resemble humping turtles and were in serious risk of falling foul of the overlapping rule! If only I'd remembered my handy cut out and keep turning guide, I wouldn't have made such a ridiculous choice of non-complimentary turning arcs... ;)
 |
| The rest of Sabre Squadron flies round in a wide arc... |
 |
| ... And again cuts in to charge the Falcon head on... |
With Sabre Squadron looking to open up with everything they'd got and try to put at least some sort of hurt on the Rebel ships, they knew they'd have to first weather another punishing round of pilot skill 9 fire from Han and Cheewie. And with target locks and gunner re-rolls in full effect, the un-relenting weight of fire resulted in another Sabre dude being blown to smithereens before he'd even had chance to pull his trigger...
 |
| Sabre Squadron fly past and align themselves for another attack run... |
 |
| After their first turning disaster, Han and Cheewie spend the next two turns giving synchronised turning another go... This time with slightly better results... |
With the subsequent demise of another Imperial Pilot, the last surviving member of Sabre Squadron said his prayers and waited for the inevitable... The Imperial boyz had done everything they could to lay the hurt on Han and Cheewie but it was clear that they were ultimately outmatched both in attack and defense - The Sabre Squadron's key asset of high maneuverability counted for little in the face of the Rebel's 360o arc of fire.
But whilst this had been a comfortable win for the Rebels, it was clear there was still a lot of work to be done in the maneuvering department and something tells me that those Imperials are only going to come back harder and stronger in the future...
Until next time ;)
No comments:
Post a Comment